Last autumn ten weeks of challenges were given on Scraputmaningen. Each week had some theme or technique to take on. For the challenge of making your own title, I decided to try out something I had been thinking about for a while. I tried to make my own chipboard title and also alter it. The following are ten steps for making your own altered chipboard title.
1. Sketch out the letters on some ordinary cardboard. Take some kind of packaging which has been around something.
2. Cut out the letters with a scissor. Try to do this as close to the finished product as possible.
3. Take a scalpel and cut those extra things that the scissor didn't mange to do.
4. Sand all edges to get a smooth look.
5. Paint all over with desired color or, as in my case, colors. Try to experiment with coloring over wet color or wait until one color is dry before you add the next color.
6. If it's tricky to color the edges, chalk them with an as similar color as possible.
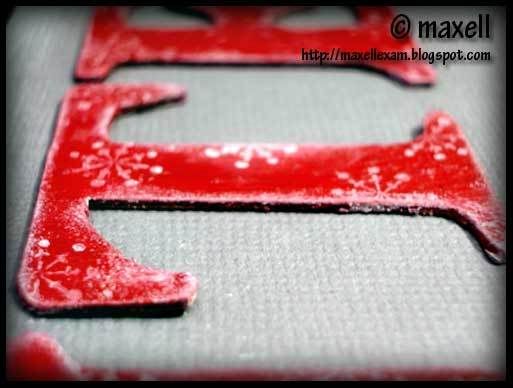
7. Chalk over the dry letter with desired color. I chose white for a frosty snowy feeling.
8. Stamp each letter with practically any stamp. Stamp in a random manner.
9. An extra option is to emboss each letter. I didn't do that (mostly depending on that I don't own the tool in question... ), but I have seen really nice letters made this way.
10. When you are satisfied with each letter, adhere them to your page with some suitable glue.
Have you tried to cut out your own chipboard letters by hand? It may seem tricky, but with some patience following the steps above will give you something which is handmade with love. :) And it's easier if you choose large letters with not that many small details.
Hope you will try this technique out. And... for the win-win that will increase our scrapping knowledge, please comment to the specific posting by giving a link to whatever you have created or do create from the theme in question.
1. Sketch out the letters on some ordinary cardboard. Take some kind of packaging which has been around something.
2. Cut out the letters with a scissor. Try to do this as close to the finished product as possible.
3. Take a scalpel and cut those extra things that the scissor didn't mange to do.
4. Sand all edges to get a smooth look.
5. Paint all over with desired color or, as in my case, colors. Try to experiment with coloring over wet color or wait until one color is dry before you add the next color.
6. If it's tricky to color the edges, chalk them with an as similar color as possible.
7. Chalk over the dry letter with desired color. I chose white for a frosty snowy feeling.
8. Stamp each letter with practically any stamp. Stamp in a random manner.
9. An extra option is to emboss each letter. I didn't do that (mostly depending on that I don't own the tool in question... ), but I have seen really nice letters made this way.
10. When you are satisfied with each letter, adhere them to your page with some suitable glue.
Have you tried to cut out your own chipboard letters by hand? It may seem tricky, but with some patience following the steps above will give you something which is handmade with love. :) And it's easier if you choose large letters with not that many small details.
Hope you will try this technique out. And... for the win-win that will increase our scrapping knowledge, please comment to the specific posting by giving a link to whatever you have created or do create from the theme in question.
No comments:
Post a Comment